
Detailed Description
Step-by-Step: Add Services Invoice
1: Navigate to Services Invoice
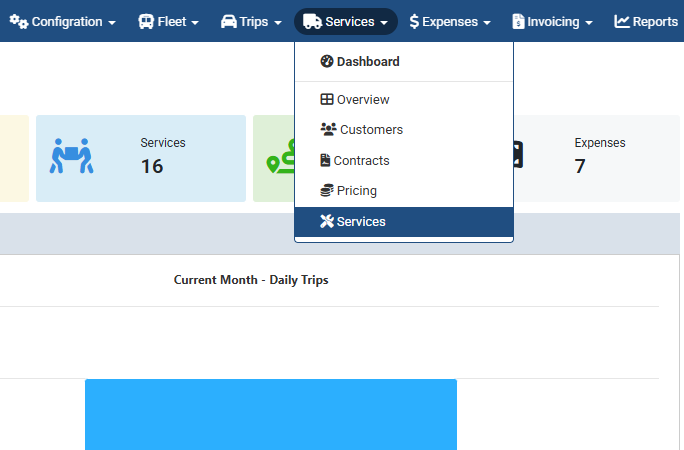
- Go to:
- Services → Invoices → Add New
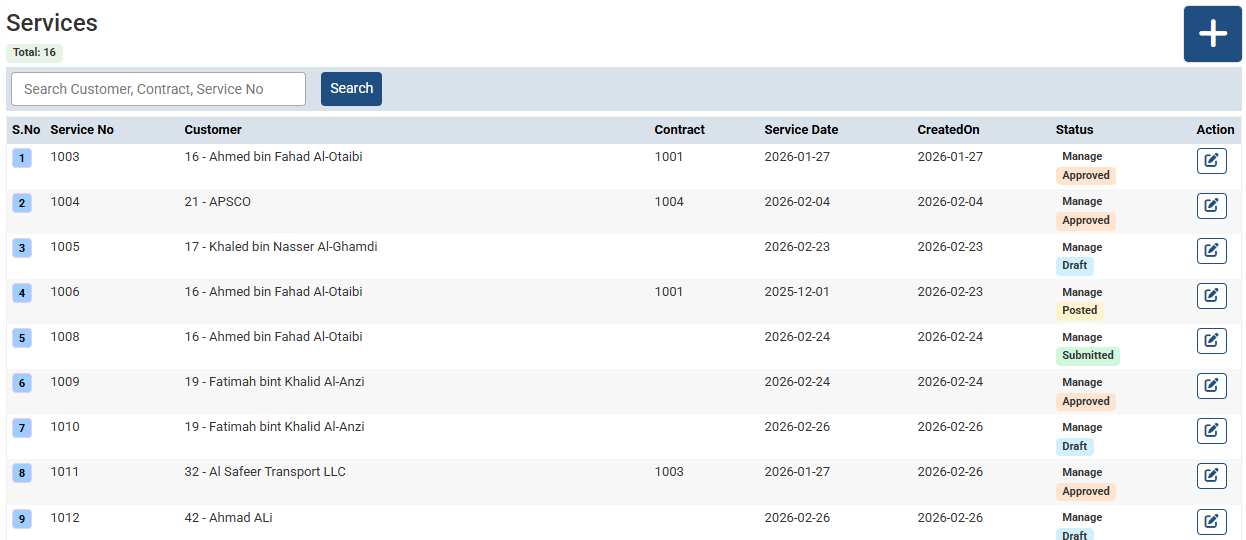
- Click “+” to create a new invoice.
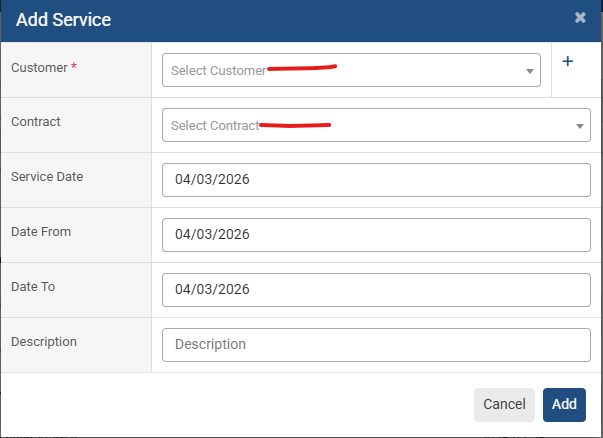
- 2: Select Customer & Contract
- Enter the following details:
- Select Customer
- Select Contract (if applicable)
- Select From Date and To Date
- The system will link the invoice to the selected contract.
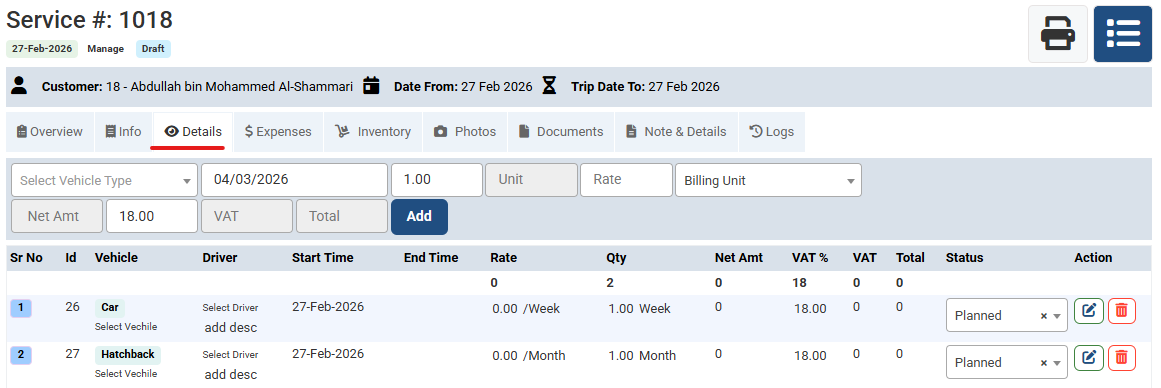
- 3: Add Service Details
- Now configure service information:
- Select Vehicle Type
- Enter Quantity (Qty)
- Enter Rate
- Select Billing Type:
- Daily
- Weekly
- Monthly
- Enter VAT %
- The system automatically calculates total amount including VAT.
- 4: Assign Driver & Vehicle
- Select:
- Driver
- Vehicle
- Service From Date
- Service To Date
- This ensures proper operational linkage and tracking.
- 5: Add Expenses (Optional)
- You can record additional expenses against the service:
- Fuel charges
- Maintenance cost
- Toll expenses
- Driver allowances
- This helps maintain accurate profitability tracking.
6: Add Inventory (If Applicable)
- If inventory items are used during service:
- Select inventory item
- Enter quantity
- Link it with service
- This ensures cost allocation and stock control.
7: Attach Documents
- Upload supporting documents such as:
- Contract copy
- Service agreement
- Supporting invoices
8: Add Terms & Conditions
Enter applicable Terms & Conditions related to billing, payment schedule, or penalties (optional but recommended).
9: Apply Workflow & Manage Status
- On invoice creation, workflow stages can be applied.
- Common Statuses:
- Draft
- Submitted
- Pending Approval
- Approved
- Rejected
- Posted
- Cancelled
- Workflow ensures proper financial and operational control before final posting.
Visual Walkthrough
add a services in Futex Logix :
Go to:
Services → Invoices → Add New
add a services in Futex Logix :
Click “+” to create a new invoice
add a services in Futex Logix :
- Select Customer & Contract
- Enter the following details:
- Select Customer
- Select Contract (if applicable)
- Select From Date and To Date
- The system will link the invoice to the selected contract.
add a services in Futex Logix :
- Add Service Details
- Now configure service information:
- Select Vehicle Type
- Enter Quantity (Qty)
- Enter Rate
- Select Billing Type:
- Daily
- Weekly
- Monthly
- Enter VAT %
- The system automatically calculates total amount including VAT.
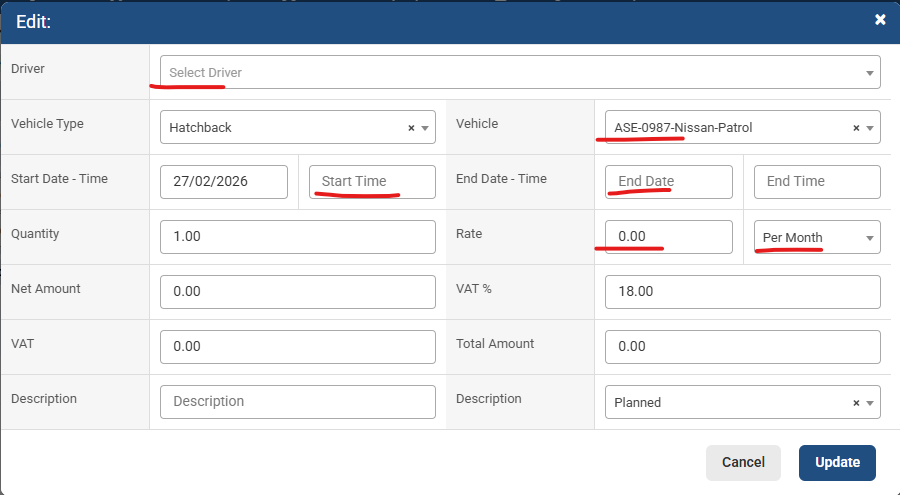
add a services in Futex Logix :
- Assign Driver & Vehicle
- Select:
- Driver
- Vehicle
- Service From Date
- Service To Date
- This ensures proper operational linkage and tracking.
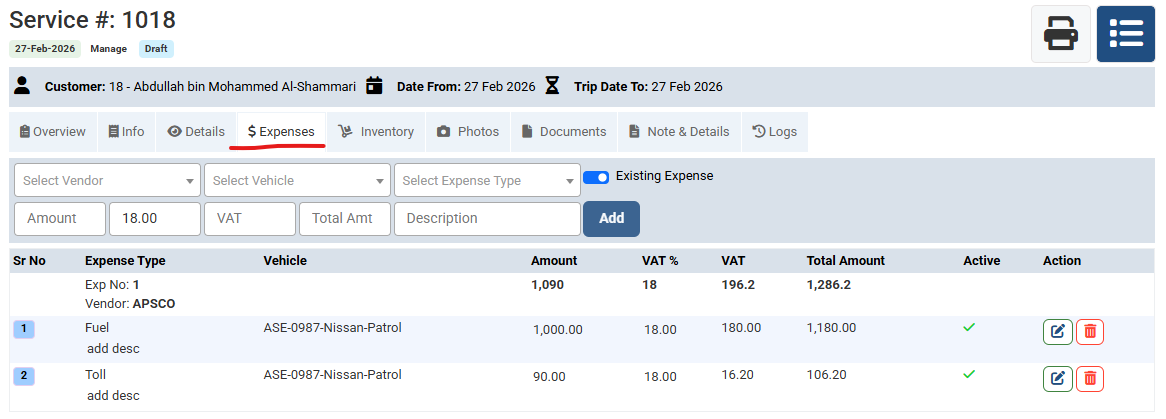
add a services in Futex Logix :
- Add Expenses (Optional)
- You can record additional expenses against the service:
- Fuel charges
- Maintenance cost
- Toll expenses
- Driver allowances
- This helps maintain accurate profitability tracking.
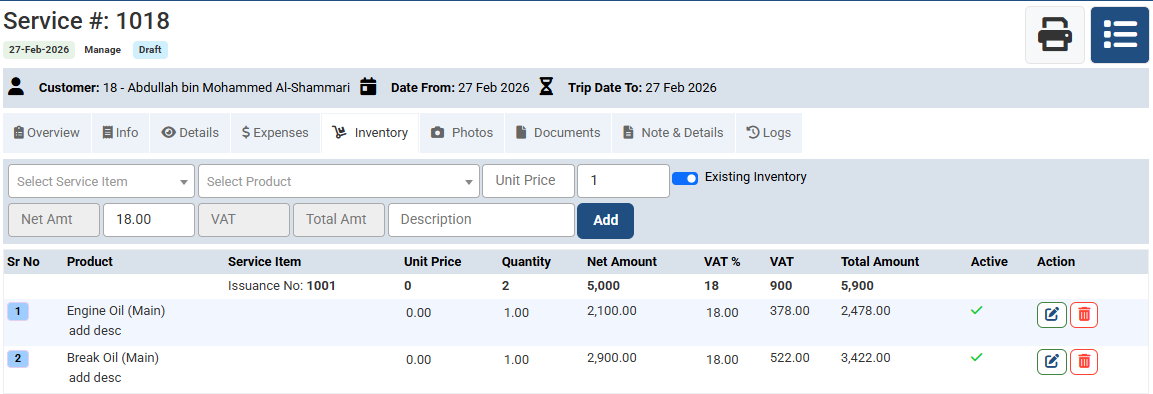
add a services in Futex Logix :
- Add Inventory (If Applicable)
- If inventory items are used during service:
- Select inventory item
- Enter quantity
- Link it with service
- This ensures cost allocation and stock control.
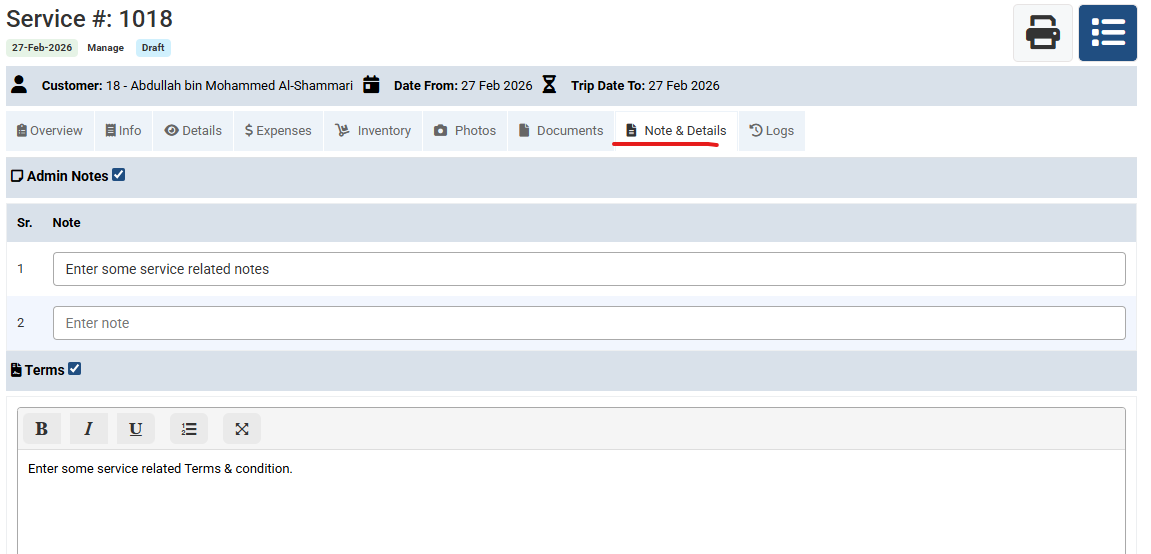
add a services in Futex Logix :
- Add Terms & Conditions
- Enter applicable Terms & Conditions related to billing, payment schedule, or penalties (optional but recommended).
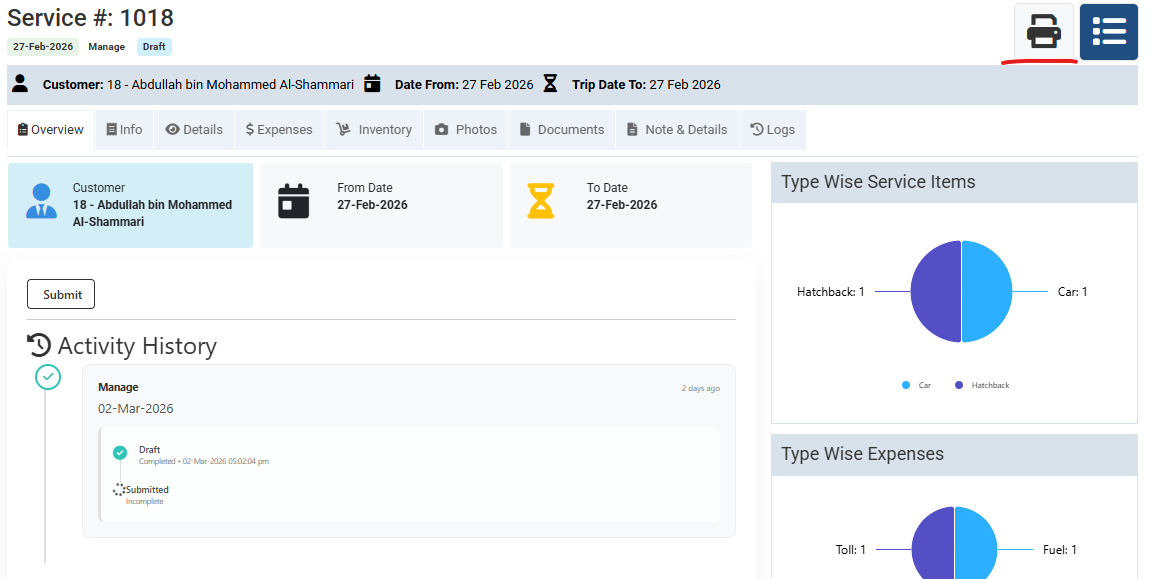
add a services in Futex Logix :
- Service Print
- Document Print etc
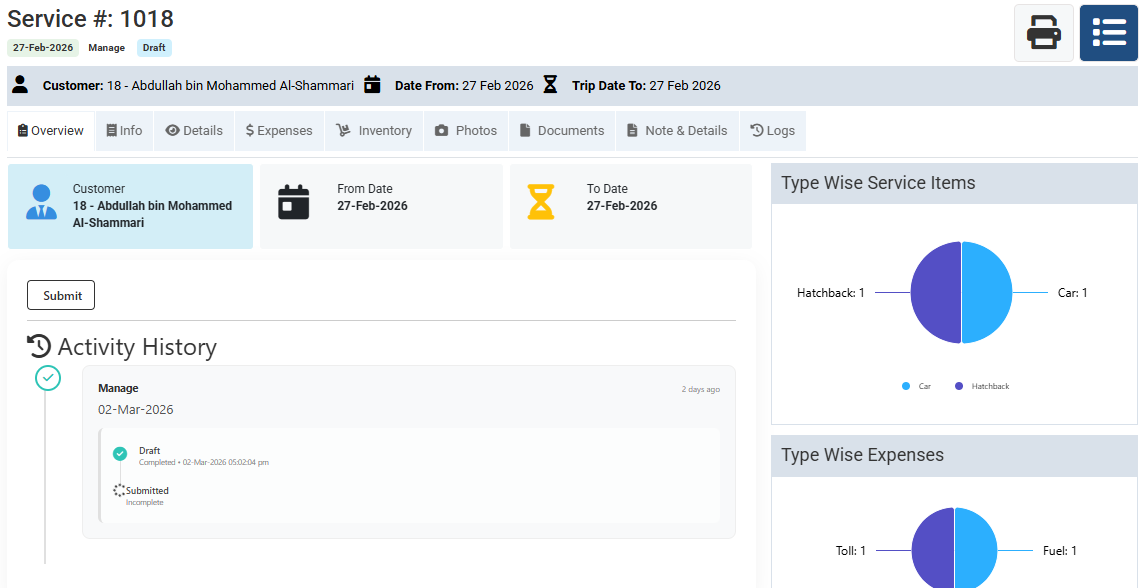
add a services in Futex Logix :
- Apply Workflow & Manage Status
- On invoice creation, workflow stages can be applied.
- Common Statuses:
- Draft
- Submitted
- Pending Approval
- Approved
- Rejected
- Posted
- Cancelled
- Workflow ensures proper financial and operational control before final posting.
No video tutorial available.
No related articles found in this category.