How to Update Diary
Learn how to update an existing diary in CloudCampus ERP LMS Academics. Access Diary Management and edit the required diary information easily. Follow the simple steps to update and save diary details successfully.This Guide & Explain article helps you update an existing Diary in CloudCampus ERP LMS Academics.
It explains how to access the diary details and update the required information.
Follow the steps below to update the diary successfully.
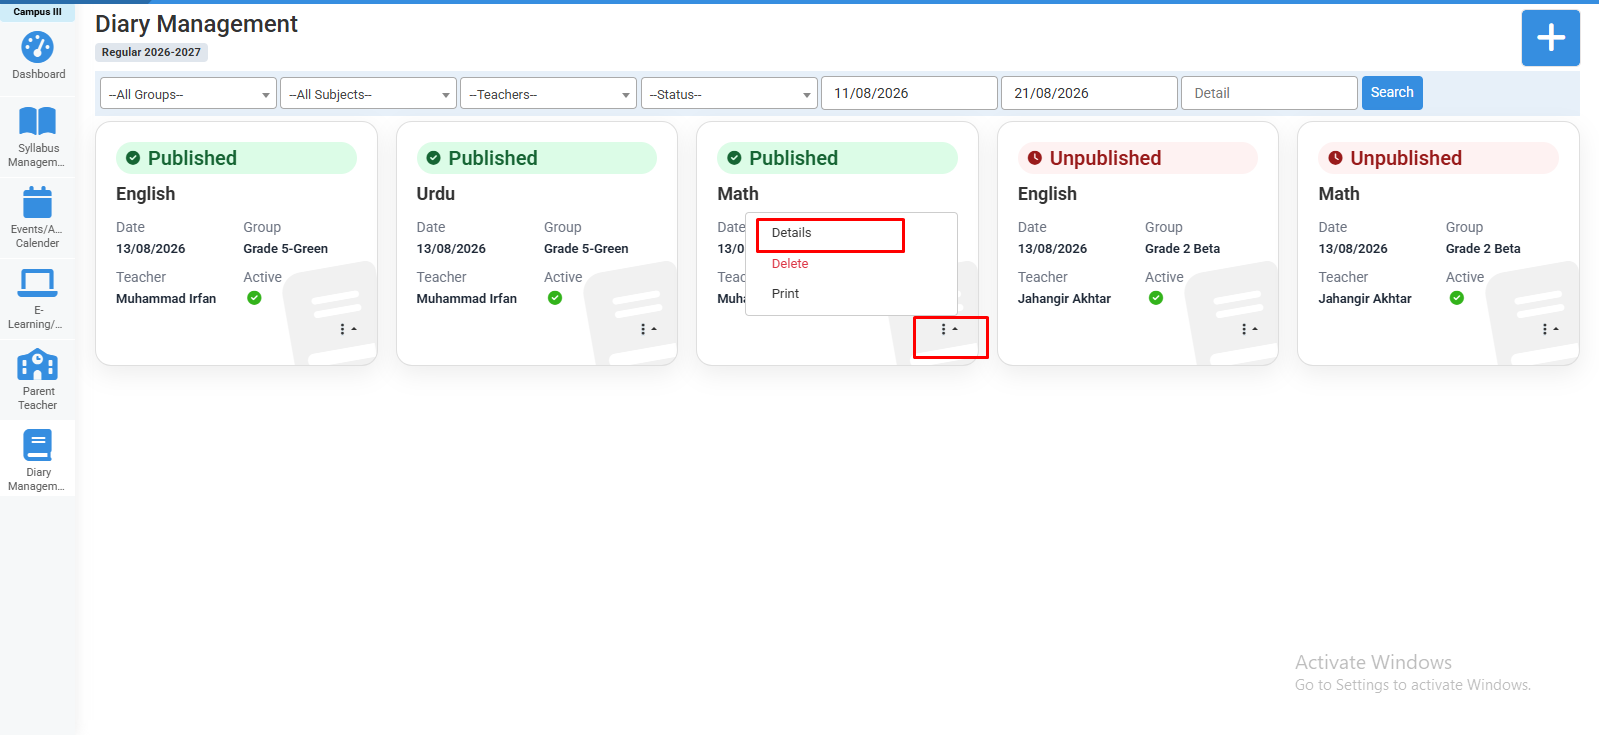
1- Go to the E-Learning/Resources module → Diary Management → Manage Diary.
2- Find the required Diary from the available diary list.
3- Click the Arrow/Action option for the required diary.
4- Select Details to open the selected diary.
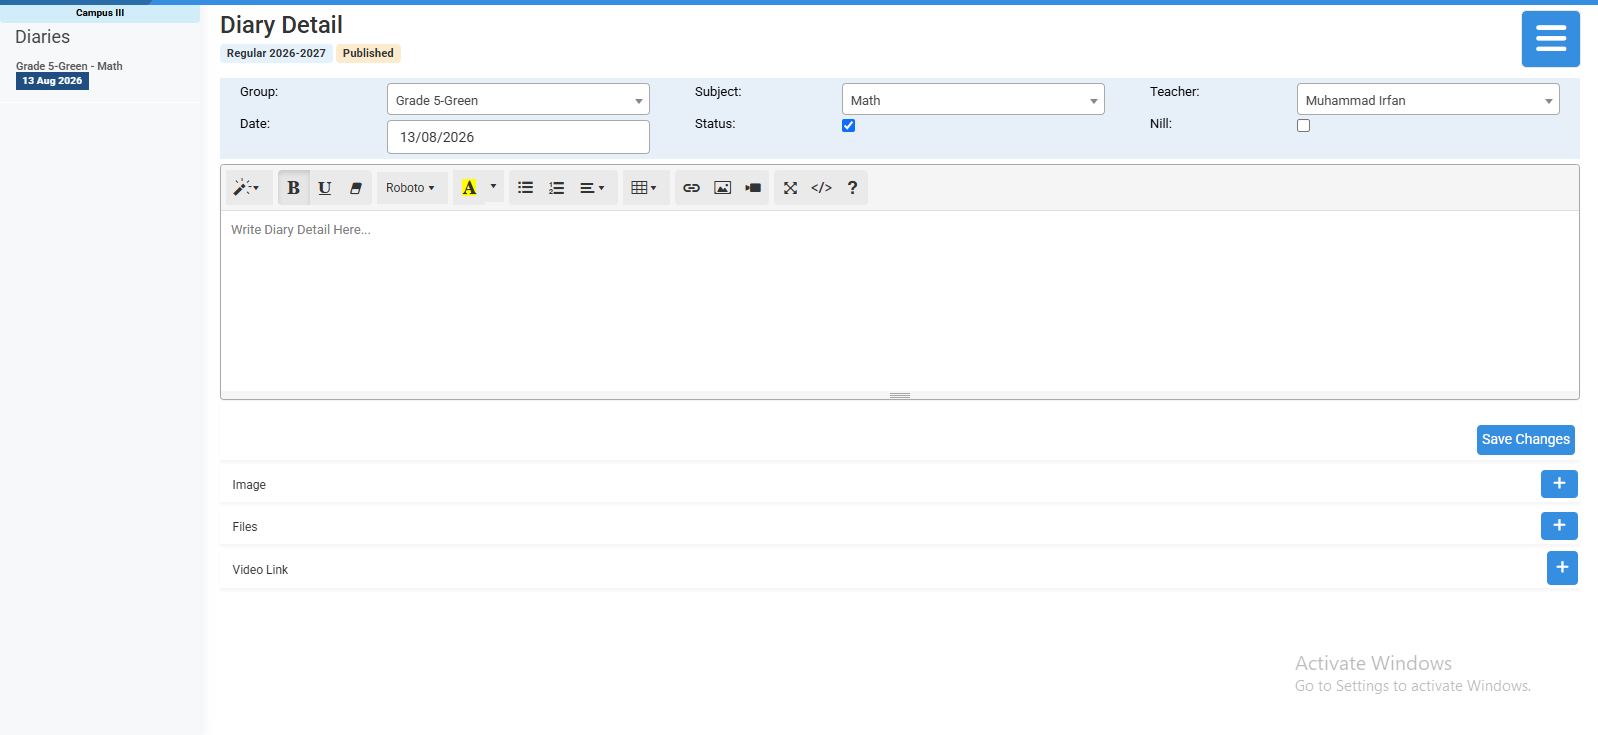
5- Review the existing Group, Subject, Teacher, Date, and Status information.
6- Update the required Group if the diary needs to be assigned to a different group.
7- Update the Subject according to the required diary information.
8- Update the Teacher if the diary needs to be assigned to another teacher.
9- Update the Date of the diary if required.
10- Update the Diary Content using the available text editor.
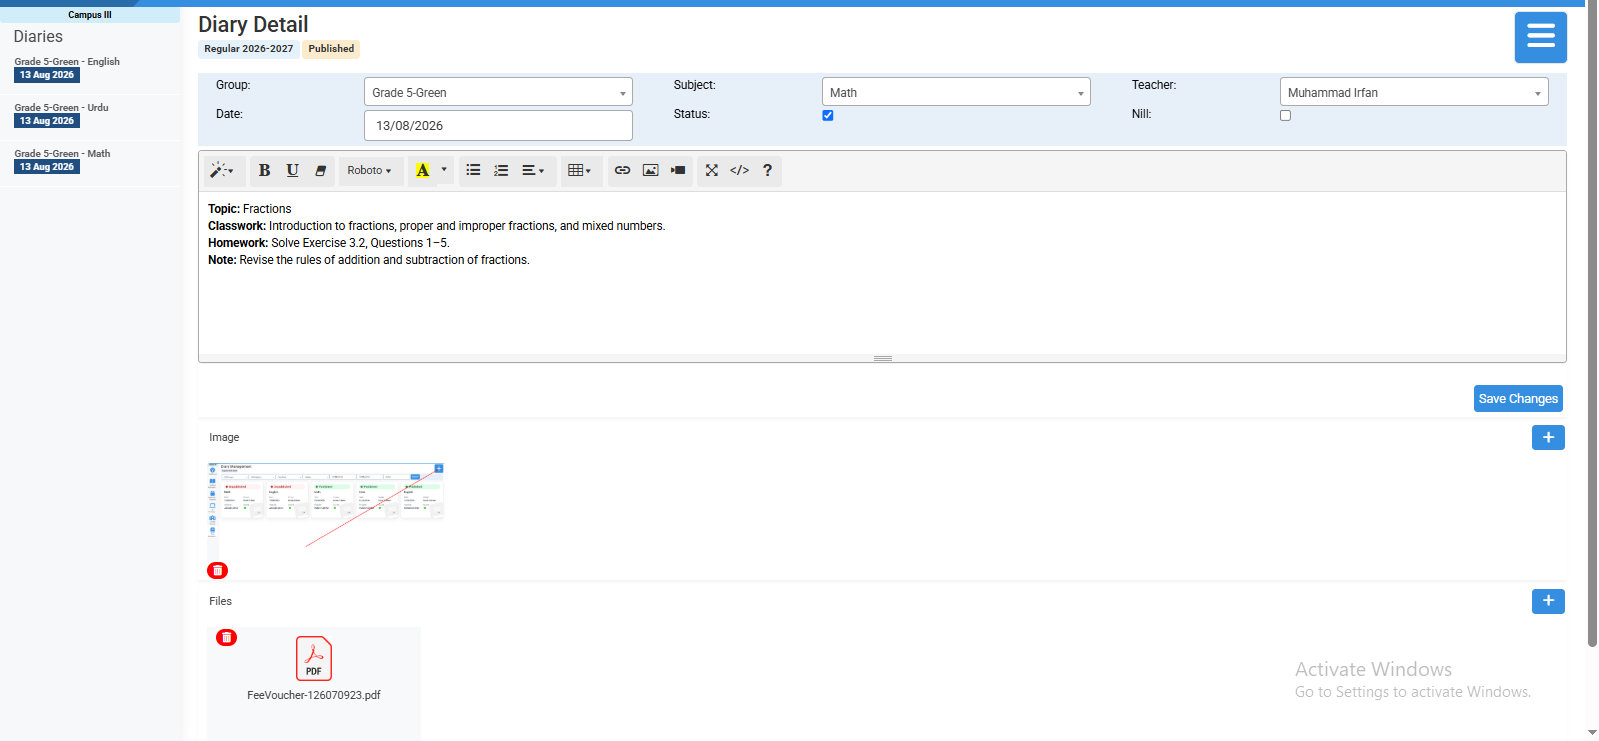
11- Add or update an Image using the available + option if required.
12- Add or update Files using the available + option if required.
13- Add or update a Video Link using the available + option if required.
14- Review all updated Diary Details to make sure the information is correct.
15- Click Save Changes to save the updated diary information successfully.

Click on details to view details.

Edit required options.

Update details and save & publish diary.
No video tutorial available.
No related articles found in this category.