
This Guide & Explain article provides a simple step-by-step process for adding a Student Result in CloudCampus ERP LMS Academics. The Add Result screen allows users to define the required exam and academic details before loading students and entering their results.
1- Go to the Results module → Add Result.
2- Select the appropriate Term for which the result is being added.
3- Select the required Class for the result.
4- Choose the relevant Sub Subject for which the result needs to be entered.
5- Select the required Exam Type according to the examination.
6- Select the Exam Sub Type if applicable.
7- Enter the Max Marks assigned to the selected subject.
8- Select the required Assessment Type for the result.
9- Choose the appropriate Grading Template used for the result.
10- Select Include in Final Result if the result needs to be included in the final result.
11- Select the Exam Date on which the examination was conducted.
12- Enter the Declaration Date for the result.
13- Select the required Topic if applicable.
14- Click Save and Load Students to save the selected details and display the relevant student list.
15- Enter the required Marks or Result Details for each student.
16- Review all entered information, then Save the result to store the student records successfully.
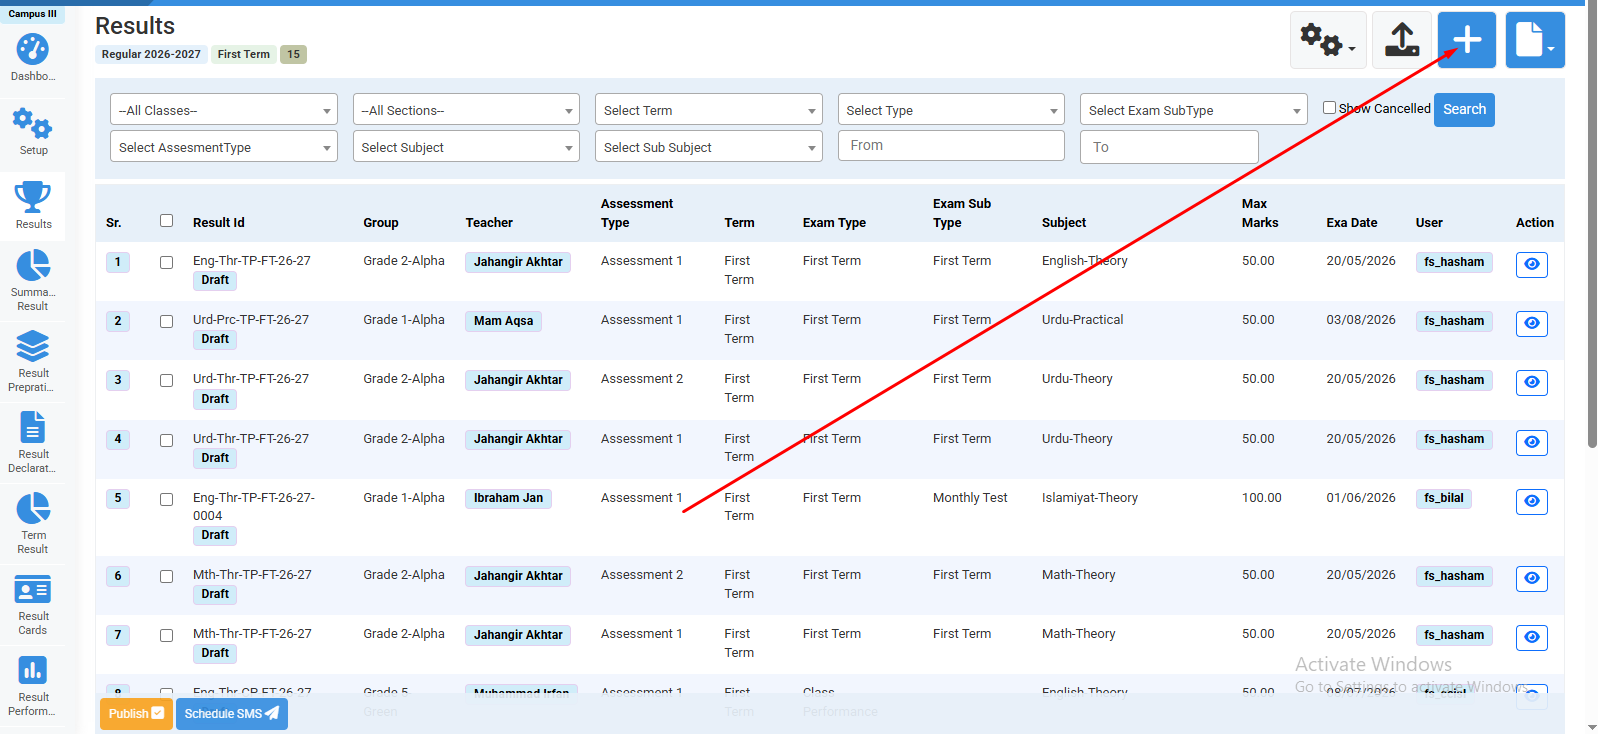
Click "+" icon to add result.
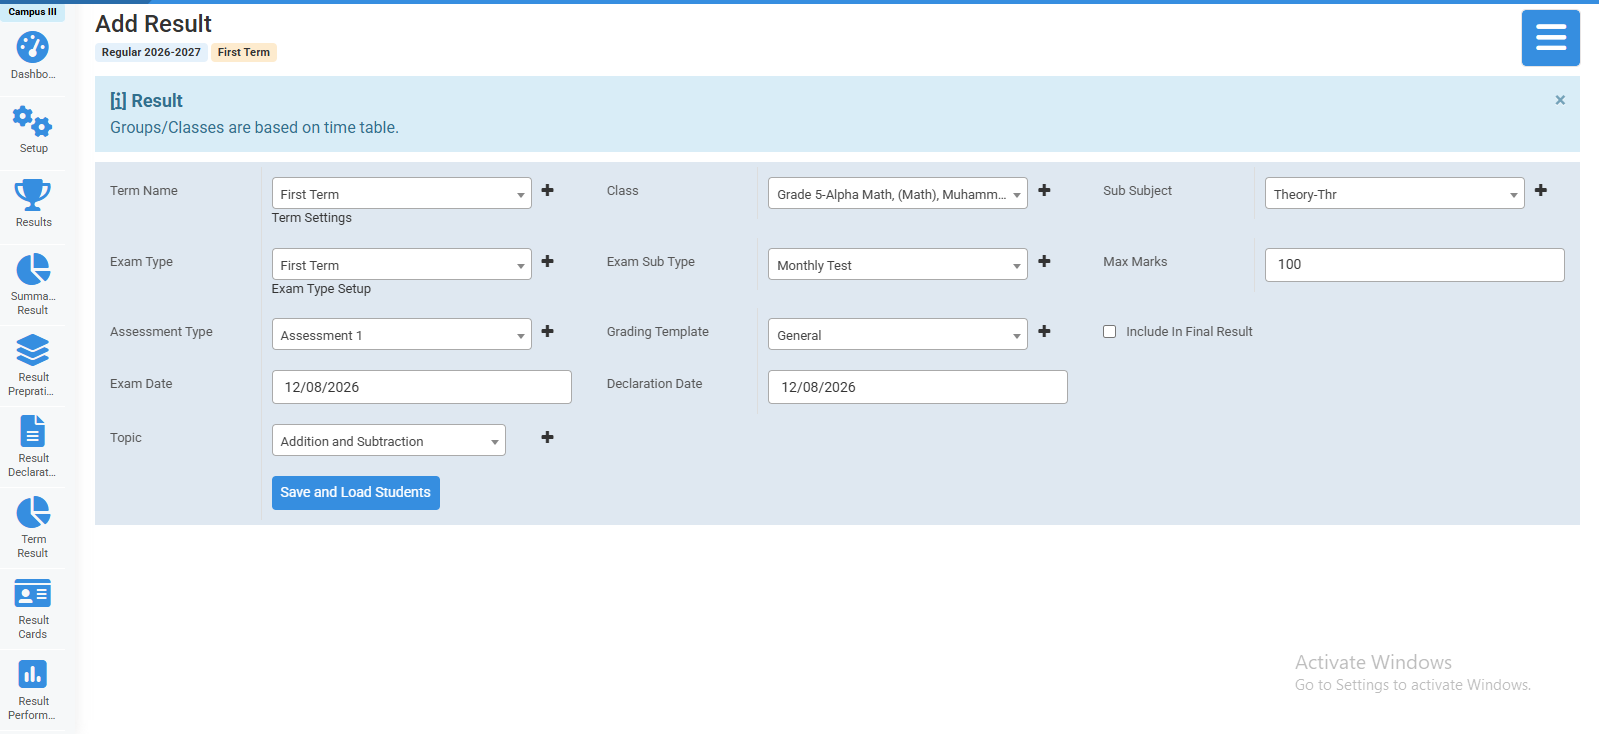
Fill all fields to add result.
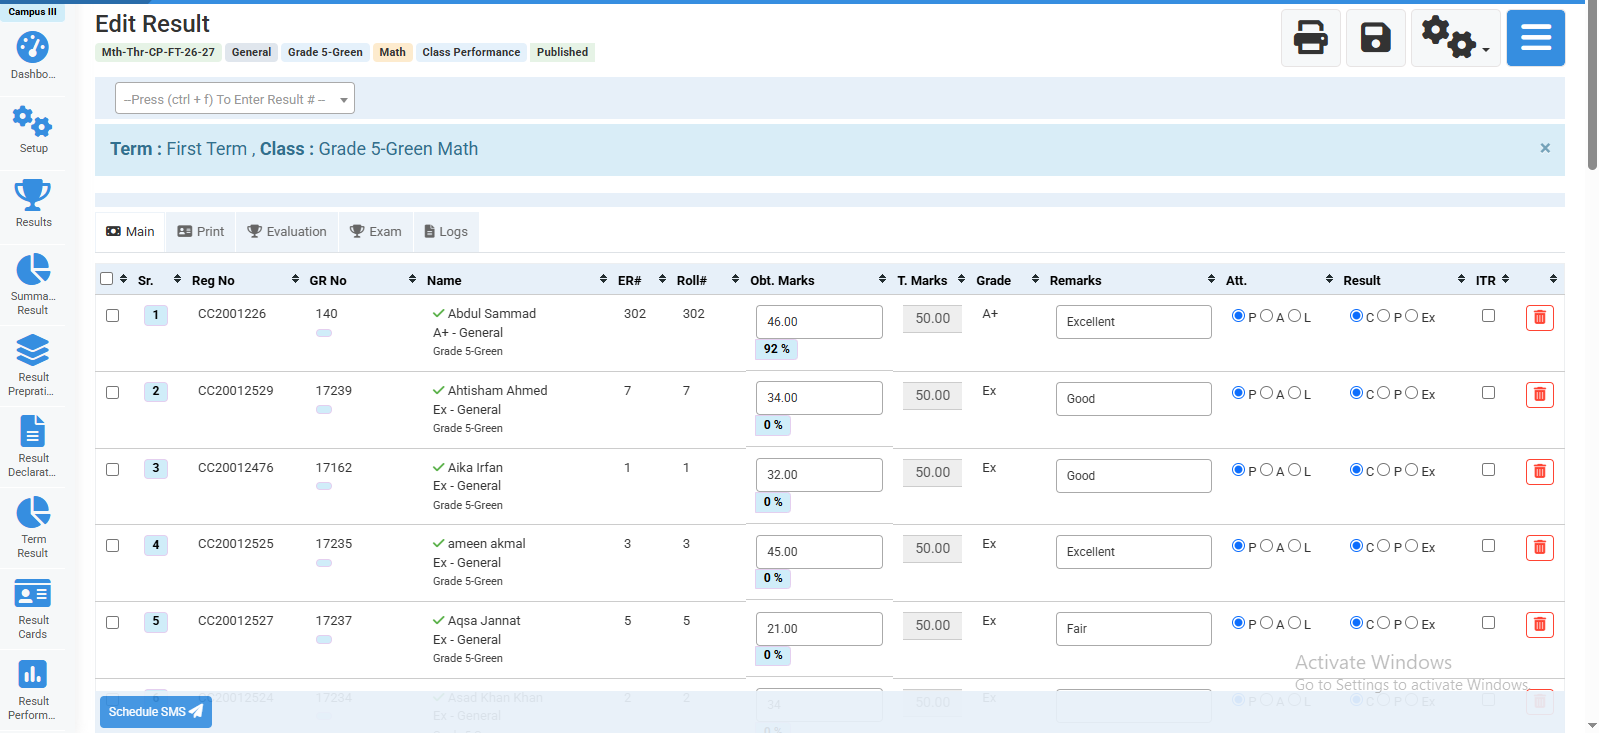
Edit result & click on save.
No video tutorial available.
No related articles found in this category.