
Detailed Description
This Guide & Explain article helps you create a Result Declaration in CloudCampus ERP LMS Academics.
It explains the required fields and steps for creating a result declaration.
Follow the simple steps below to create and save the declaration successfully.
1. Go to the Results module → Result Declaration → Click the Add (+) button.
2. Select the appropriate Session for which the result declaration is being created.
3. Select the required Stage or class level for the result.
4. Choose the Declaration Type according to the type of result declaration.
5. Select the required Term for which the result is being declared.
6. Enter a suitable Title or description for the result declaration.
7. Select the Date on which the result declaration is being created.
8. Enter the Period From date to define the starting date of the result period.
9. Enter the Period To date to define the ending date of the result period.
10. Review all selected information, then click Create to save and create the Result Declaration.
It explains the required fields and steps for creating a result declaration.
Follow the simple steps below to create and save the declaration successfully.
1. Go to the Results module → Result Declaration → Click the Add (+) button.
2. Select the appropriate Session for which the result declaration is being created.
3. Select the required Stage or class level for the result.
4. Choose the Declaration Type according to the type of result declaration.
5. Select the required Term for which the result is being declared.
6. Enter a suitable Title or description for the result declaration.
7. Select the Date on which the result declaration is being created.
8. Enter the Period From date to define the starting date of the result period.
9. Enter the Period To date to define the ending date of the result period.
10. Review all selected information, then click Create to save and create the Result Declaration.
Visual Walkthrough
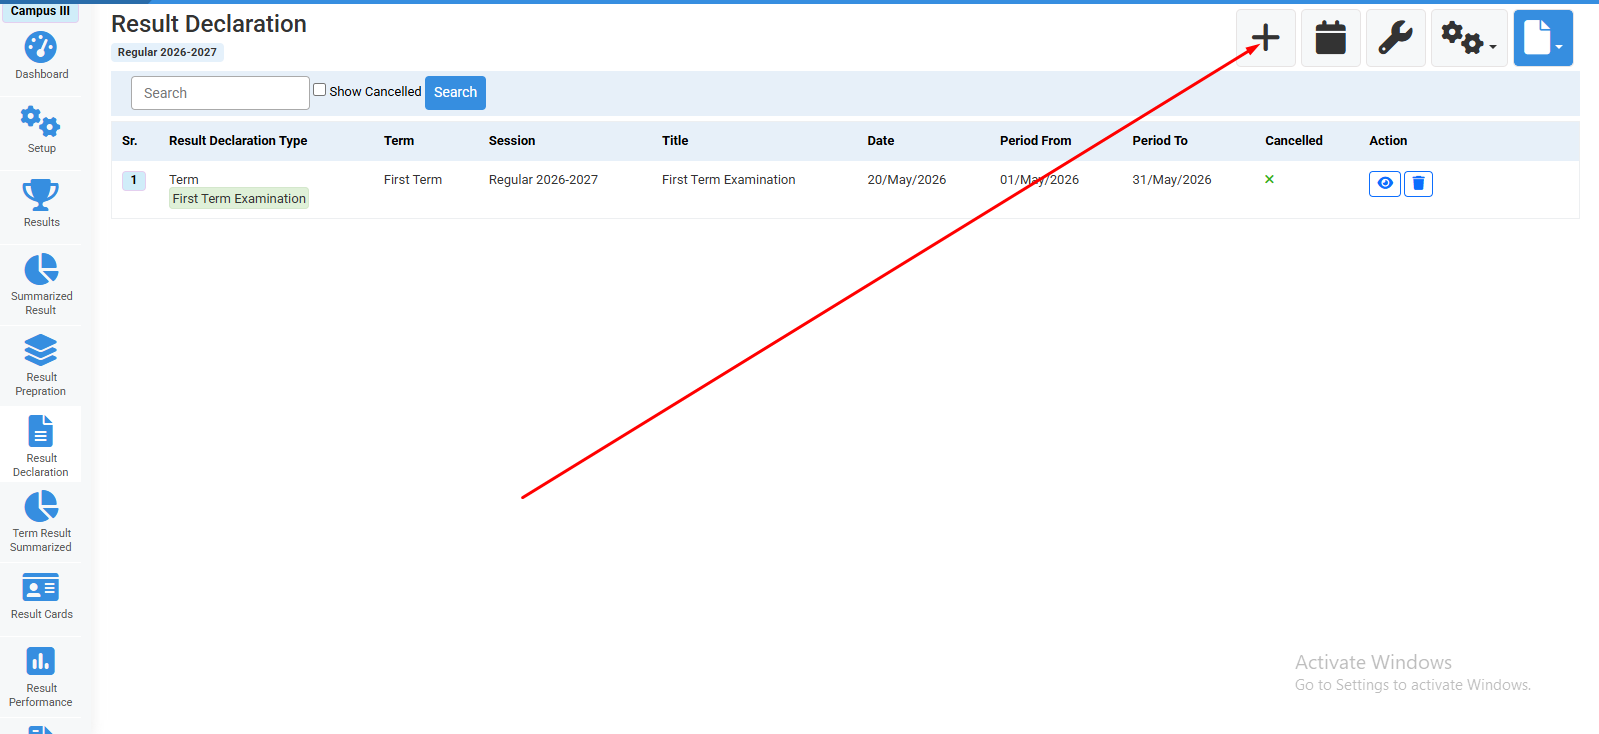
How to Declare Result :
Click on "+" icon to create declaration.
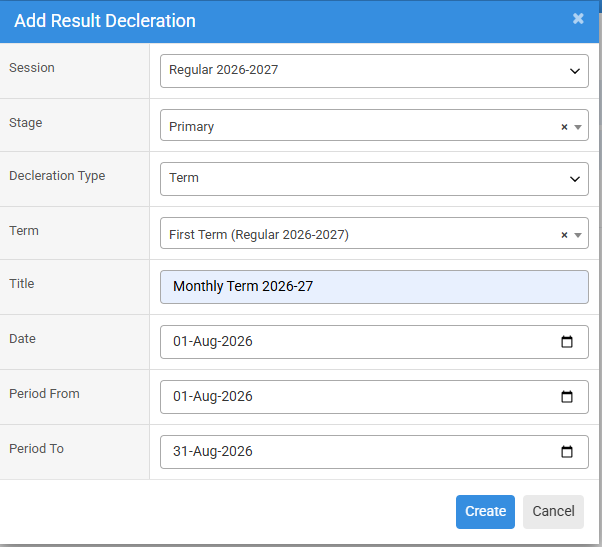
How to Declare Result :
Fill all required data and click on create.
No video tutorial available.
No related articles found in this category.